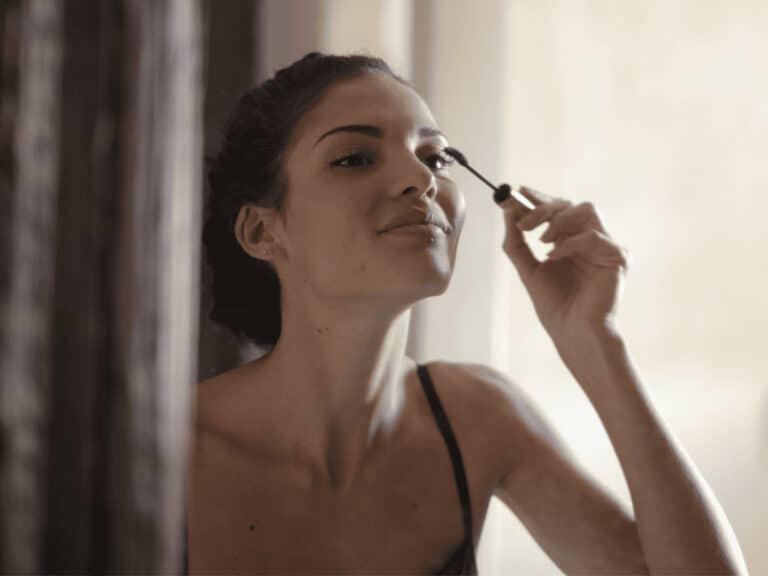
⏰Quick Steps (Total time: ~3 minutes)
- Start with clean, dry lashes
- Curl your lashes first (never after)
- Wipe extra product off the wand
- Apply 1–2 thin coats from root to tip (second coat right away if you want)
- Let it sit for about 75 seconds (hands off, try not to blink)
- To remove: press warm water for 15–30 seconds, then slide the tubes off — no remover needed
Okay, so here’s the thing: tubing mascaras really are a game-changer — but only if we actually know how to use tubing mascara the right way.
At first glance, they just look like another mascara wand in a tube. But the magic? It’s all in the formula. Tubing mascara feels feather-light, locks on all day, and then when it’s time to take it off — warm water and a little pressure, and boom, no raccoon eyes. No drama.
But let’s be real: the first time most of us try one, it feels kinda weird. If you’ve swiped it on and thought, “Um… is this even doing anything?” — trust us, you’re not alone. The trick isn’t that tubing mascaras don’t work; it’s just that no one actually shows us how different they are compared to the regular stuff.
That’s exactly why we pulled this guide together. We’re going to walk through, step by step, how to use tubing mascara — from prep, to applying, to removing at night without tugging or losing a single lash. And because we’ve made the rookie mistakes ourselves, we’ll call those out too, so you can skip the frustration and get straight to the good part.
So whether you’re brand-new to tubing or you’ve tried before and ended up confused, this is the guide that’s going to make it click.
📌 BTW, if you’re still not sure what tubing mascara even is? Check out our full explainer on what tubing mascara actually is. That’s where we break down all the benefits, ingredients, and even the myths.
📌 And if you’re already in love and just want the top picks? Head over to our roundup of the best tubing mascaras of 2025 for budget steals and clean beauty favorites.
💄 Inside This Guide
Before You Start – Prepping for Success
Alright, so here’s the deal: tubing mascara isn’t hard, but it is a little picky. Think of it like that friend who always looks effortless—except you know she did her prep behind the scenes.
Same story with tubing mascara: if we set it up right, it stays locked all day, goes on smooth, and slides off later with zero drama.
Here’s how we (and honestly, anyone hooked on tubing mascara) make it work:

Clean, Dry Lashes Only
First things first — tubing mascara only plays nice on a fresh canvas. If there’s even a trace of eye cream, concealer, or SPF, the tubes won’t stick right.
💡Quick Hack: blot your lids and lashes with a tissue. Even “invisible” residue can lead to flaking.
Don’t Mix and Match
Tubing mascaras like to work solo. Layering them over a volumizing or waterproof formula? Hello, clump city.
The upside? They’re perfect on top of lash lifts or tints for that clean, defined look without any extra bulk.
Curl First, Not After
Tubing is super lightweight, which means it actually holds a curl beautifully. But only if you curl before. Curling after mascara sets can snap or pull the tubes right off.
💡Products to Avoid: lash primers — they’re often loaded with oils, waxes, or silicones, and tubing mascaras hate that.
Always remember, with tubing mascara, Less is more: clean lashes = happy lashes.
📌Want the right way to curl without damage? Check out our How to curl your lashes guide.
How to Use Tubing Mascara (Step-by-Step Guide)
Alright, so once your lashes are prepped, the whole “using” part really comes down to –
Mainly three moves:
- Get the top lashes coated,
- Don’t forget the bottoms, and then
- Slide it all off clean at the end of the day.
That’s it. And honestly? Once you nail the rhythm, tubing mascara feels faster and way less dramatic than the old-school formulas.
How to Apply Tubing Mascara on Top Lashes
Okay, let’s kick things off with the top lashes — the real spotlight. This is where tubing mascara shows off, giving you that clean length without clumps.
What you’ll need:
- (Optional) Lash curler for extra lift
- A mirror with good lighting
- Your tubing mascara wand
Here’s the little rhythm we follow:
Required Total Time: ~ 1 and a half minutes
Step 1 – Curl First, Then Wipe the Wand
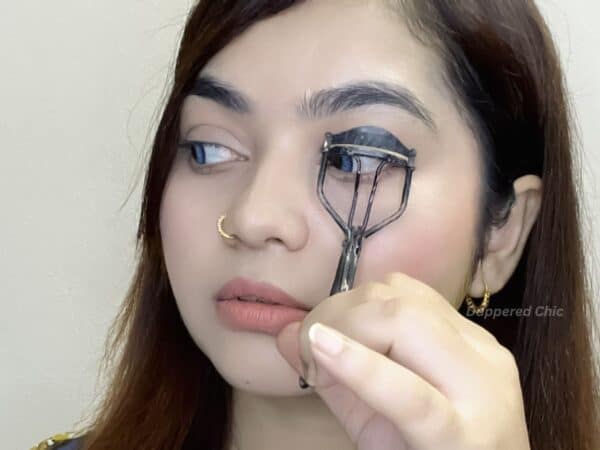
Lock in the curl before any product touches your lashes. Tubing mascara is feather-light, so it holds curl beautifully — but it won’t create it for you.
📌 BTW, if you’re not sure you’re curling the right way (or you’ve ever worried about lash damage), check out our complete guide on how to curl your lashes the right way. It’s packed with little hacks we actually use.
Step 2 – Root to Tip, Smooth Wiggle
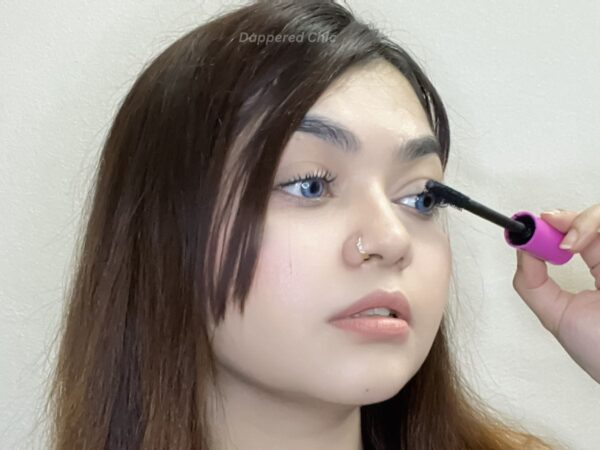
At first, scrape off the extra formula on the rim of the tube (not tissue — fibers will ruin everything).
Place the wand at the root, give it a tiny wiggle, and pull straight through to the tips. That wiggle anchors the tubing formula so it wraps each lash in its little “sleeve.”
💡 Always remember, one clean coat > five sloppy ones. Precision always wins.
Step 3 – Second Coat (Right Away)
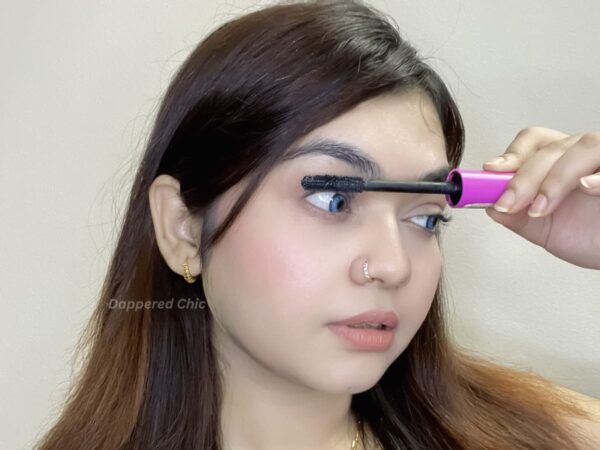
If you want a bit more length? You can go for coat #2 immediately while the first is still wet. Because once the tubing mascara sets, it won’t layer.
So, two thin coats at max = quick, clean, done.
💡 Think of tubing as a one-minute art project: apply fast, keep it neat, then let it be.
Step 4 – Let Them Set (~75 Seconds)

Now the most challenging part: doing nothing. Don’t blink or touch while your lashes dry. Around 50 to 60 seconds is the sweet spot. You’ll know they’re set when you tap and nothing transfers.
💡 Unlike traditional mascaras, tubing doesn’t need 3–4 passes. Just 1–2 coats = full flutter.
How to Apply Tubing Mascara on Bottom Lashes
Now, bottom lashes. They’re usually the messy part with traditional mascara, but with tubing, it’s way easier if you keep a lighter touch.
What you’ll need:
- A mirror (preferably angled slightly down)
- Your tubing mascara wand
- (Optional) A card or shield to protect the under-eyes
Required Total Time: ~ 30 to 45 seconds.
Here’s the rhythm we follow down there:
Step 1 – Flip the Wand Vertical
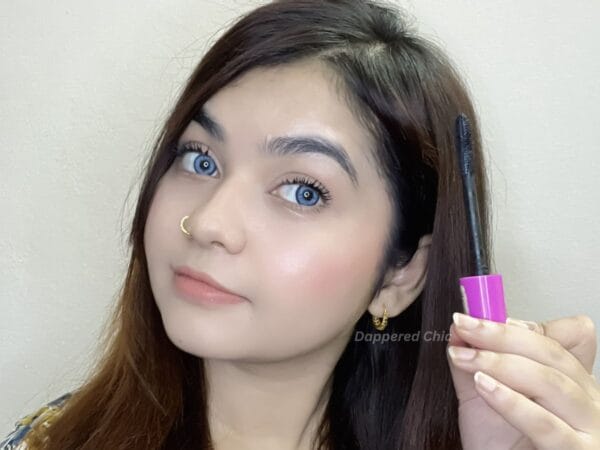
Turn the wand upright and use just the tip — way less risk of coating your under-eye.
Step 2 – Dot, Don’t Swipe
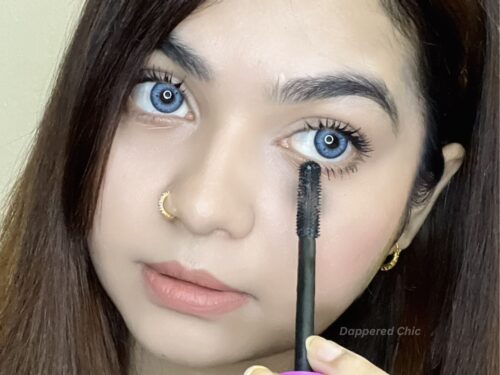
Tap-tap-tap along the lash line. Dotting gives more control and keeps things neat.
Step 3 – Shield If You Need
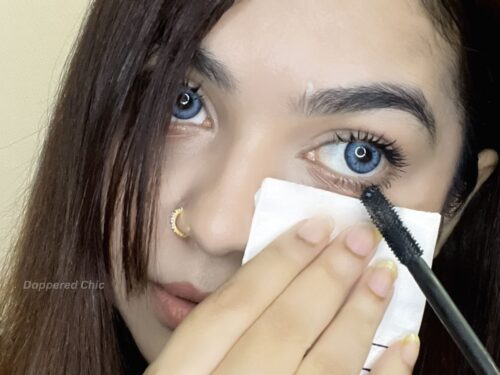
Nervous about smudging? Use a card or a folded paper towel, or maybe the back of a spoon, as a quick barrier. Zero mess, zero stress.
Step 4 – Keep It Light
One thin coat is plenty for bottom lashes. More than that, it can go spidery really fast. A single tubing coat – just opens up your eyes beautifully — without the raccoon look.
How to Remove Tubing Mascara
Alright, so we’ve curled, coated, and we’re looking good. Now comes the part that usually gives mascaras their bad rep: removal. But guess what? This is where tubing mascaras totally flex.
If you’ve ever stood at the sink scrubbing waterproof mascara off, you’re about to fall in love with this formula for sure. No raccoon eyes, no oily removers, and no lashes sacrificed in the process.
What you’ll need:
- Warm water
- Clean fingertips (or a soft washcloth/cotton pad if you prefer)
Required Total Time: ~ 1 to 1 and a half minutes.
Here’s how we take it off — drama-free:
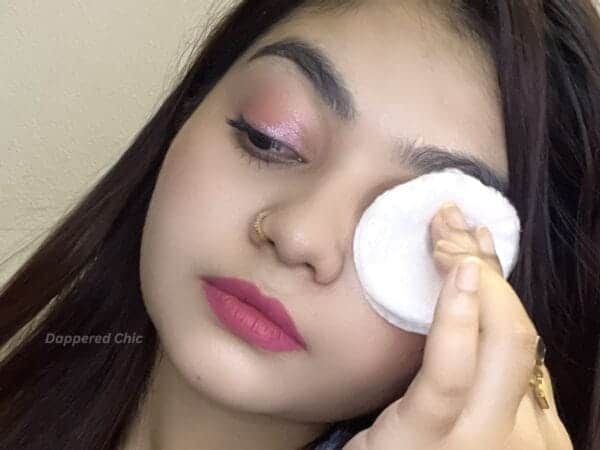
Step 1 – Warm Water Only
Tubing mascara doesn’t care about cleansers or wipes — it responds to warmth. Just splash your lashes with warm (body temp) water. Need even better? Soak a washcloth, press it over closed eyes for 20–30 seconds, and relax.
💡The tubes soften with gentle heat. Don’t rush. Let the water do the work.
Step 2 – Press, Don’t Rub
Once softened, removal is ridiculously easy. Use your fingertips to gently pinch and slide downward. The little “sleeves” slip right off — so, no tugging, no scrubbing, and no lashes lost in the process.
Step 3 – Expect Threads, Not Smears
The first time, it feels a little odd. You’ll see tiny black “threads” on your fingers — those are the tubing coats, not your lashes. Weirdly satisfying, and 100% mess-free.
- 💡 Pro Tip: Skip the remover. Oils and micellar water actually break the tubing bond. Warm water is all you need.
- ⚠️ Safety Note: If you ever feel irritation, stop right away. Never tug dry tubes — soften first. If irritation continues, check with an eye specialist.
🎯 Ready to Try Tubing Mascara?
Now you know how to use tubing mascara step by step — and just as importantly, how to take it off without the raccoon-eye drama. All that’s left? Finding your perfect match.
- 📌 We’ve already done the testing (and the lash-flaking for science), so you don’t have to. Head over to our best tubing mascaras of 2025 roundup for beginner-friendly, smudge-proof formulas that actually live up to the hype.
💡Editor’s Pick: Best Tubing Mascara for Beginners
If you’re brand-new to tubing, we recommend that you go for Thrive Causemetics Liquid Lash Extensions Tubing mascara because we have found this tubing mascara to be effortlessly easy in our test.
And, if you want that clean tubing look without paying prestige prices, we recommend the Milani Highly Rated Lash Extensions Tubing Mascara. In our tests, it performed way above its compared to it’s price tag.
Want to explore even more tubing mascaras before you decide? We tested a whole lineup — from cult classics to hidden drugstore gems. You can check out our complete guide here: Best Tubing Mascara 2025.
🌸 Psst…
Some links in this post are affiliate. If you shop through them, we may earn a small commission (no extra cost to you!). Think of it as buying us a coffee while we keep testing beauty favorites for you.💄
Common Mistakes to Avoid
Alright, so here’s the truth: tubing mascara is meant to be easy. Ridiculously easy. But there are a few rookie traps that can mess with the magic.
Think of these as the “don’t do this” notes we’d give a friend before handing her the wand:
❌ Layering over waterproof mascara
Don’t. Tubing needs its own clean stage. Mixing it with other formulas is like wearing sneakers over heels — trust us, it makes no sense. You’ll just get clumps and flakes.
❌ Applying lash oils or serums right before
Oils at night? Great. But, oils in the morning before applying tubing mascara? Disaster. It’s like putting lotion on before painting your nails — nothing sticks. Save the oils for bedtime.
❌ Reaching for makeup remover
Old habits die hard, but forget balms, oils, or micellar water. This isn’t regular mascara. With tubing mascara, warm water does the whole job — and honestly, that’s the beauty of it.
❌ Packing on five coats “just in case”
More ≠ better. Two quick, thin coats = fluttery lashes. Five coats = stiff, spidery mess.
❌ Curling after it dries
Massive no. Once the tubes are set, they form a sleeve. Curling after is like trying to bend a shell — it’ll snap or peel. Not cute.
💡 Fun fact: Tubing works so well because each lash gets its own tiny sleeve. But oils, primers, or extra layers weaken that bond. Please keep it clean and straightforward, and the results will amaze you.
Tubing Mascara Troubleshooting
Okay, so let’s be honest — even with the easiest mascara ever, little hiccups can happen. The good news? Tubing mascara is super forgiving, and every “uh-oh” usually has a quick fix.
We pulled together the most common issues we (and pretty much everyone) have run into, plus the fastest ways to fix them without messing up your whole look.
| Symptom | Likely Cause | Quick Fix |
|---|---|---|
| Flakes by midday | Oils/eye cream residue | Scrape the wand rim, apply 2nd coat immediately |
| Clumpy application | Too much product or late 2nd coat | Smudges under the mask |
| Tubes won’t slide off | Water too cool / not enough soak | Use warmer water (37–40 °C), press 20–30s |
| Smudges under the mask | Steam + oils | Set under-eyes with translucent powder |
| Curl drops midday | Curling after set tubes | Only curl before; re-curl after removal |
Frequently Asked Questions
Alright, let’s clear things up — because if you’re new to tubing mascaras, we’re pretty sure at least one of these questions has already popped into your head:
❓Can I curl after applying tubing mascara?
A Big no. Always curl first. Once tubing sets, it’s like your lashes are wearing tiny coats — curl after that, and they can snap or peel right off. Not worth it.
📌 Curious? Here’s our complete guide on how to curl your lashes like a pro.
❓Does tubing mascara flake or smudge?
It’s kind of up to you. Tubing formulas don’t flake or smudge unless oil or old product is messing with the bond.
💡Formula to remember: Fresh mascara + clean lashes = no flakes, no panda eyes.
❓Do I need makeup remover to take it off?
Nope. And that’s the beauty of tubing. All you need is some warm water + gentle pressure = tubes slide right off. In fact, oils or removers just make things messy.
Curious about the exact steps? Check how to remove Tubing Mascara (step-by-step).
❓How long should I let tubing mascara dry?
About a minute, give or take. We love the 50 to 60-second mark.
Quick test: tap your lashes — if nothing transfers, you’re good.
❓Is it safe for sensitive eyes or contact lens wearers?
Yes! Tubing mascara is one of the gentlest options out there. Just wait a couple of minutes if you’re using eye drops, so the tubes can bond properly.
📌 And hey, if you want to see what others are saying too, check out this Healthline deep dive on tubing mascara and this eye-care perspective from Pam Theriot, OD. Extra peace of mind never hurts, right?
📌 BTW, for sensitive eyes, we always recommend the Blinc Original Tubing Mascara (full review here) or the Essence Bye Bye Panda Eyes! Tubing Mascara (our review).
❓Does it really hold up in humidity or at the gym?
Yes, tubing mascaras hold up really well, but they are not exactly like waterproof formulas. If you need max hold, go waterproof.
📌 Check out our Best Waterproof Mascara of 2025 if you’re gym-proof hunting.
📌 Still curious? Dive into our full explainer on what tubing mascara is — we geek out on the science, ingredients, and myths.
Why Tubing Mascara Is Different?
Here’s why we’re obsessed (and we are confident, once you learn how to use tubing mascara, you’ll probably never go back to the regular mascara for everyday wear):
- Rushed mornings? No mirror checks every hour. Tubing holds.
- Sensitive eyes? No stingy removers needed.
- Long days? Fresh lashes right up until removal.
Unlike waterproof mascaras, tubing gives you the best of both worlds: serious stay-put power and mess-free removal. That combo is rare — and once you get it, you’ll wonder why you didn’t try it sooner.
Final Thoughts – Tubing Mascara Is Easy (Once You Know How)
Okay, so to wrap it all up: tubing mascara can feel a little odd the first time, and that’s only because it applies and removes differently than the mascaras we’re used to. But here’s the secret — different doesn’t mean hard.
Once you get the rhythm down, you’ll see why people swear by it: cleaner lashes, smoother coats, faster drying, and easy removal with just warm water. Honestly, it’s one of the simplest swaps you can ever make in your beauty routine.
💬 One of our testers put it best:
I used to deal with smudges by lunchtime — tubing mascara fixed that overnight.
And honestly? We think it’ll be the same for you, too.
👋 And that’s it! Thanks for hanging out with us. Hopefully, this guide made how to use tubing mascara feel way less mysterious and way more doable. Try it once, and you’ll get why so many of us refuse to wear anything else.
🎯 Want to have another budget option – that we always recommend?
If you’re ready to give tubing mascara a test run, you can also start with Essence Bye Bye Panda Eyes! Tubing Mascara – this budget tubing mascara works like magic:
- ✅ Works exceptionally well for everyday, casual wear
- ✅ Budget-friendly but still smudge-proof and easy-off
- ✅ Great starter option if you want to “test drive” tubing without splurging
Last update on 2026-02-10 / Affiliate links / Images from Amazon Product Advertising API


